Post 4 - Oh, I see!
Well, it's been a
busy few weeks with family birthdays, a trip to Portugal and a very
interesting day at the culmination of UK Robotics Week. This was a
day of talks and an exhibition hosted by the IET at their
headquarters in London, and supported by the UK-RAS, EPSRC, the Royal
Acedemy of Engineering and the ImechE, so a prestigious event. Of
particular interest to me were the talks on Robots in Extreme
Environments, and Robots in social Care, both of which I have an
interest in, and form the basis of what I'm doing here on the blog.
There's also an exhibition on Robotics at the Science Museum in
London, although I don't think I'll have time to get to see that :-(
. Still, can't do everything!
So, what have I been
up to in the lab? I hear you ask. Well, I'll tell you. I wanted to
continue making progress on the basic head I showed last time, and
top of my list was to do some camera work – at least some basics
which can be built on later. First up was to dig out my MSc project
and refresh myself on how to do the software.
For this level I'm
using Python 2.7 with the SimpleCV vision library. The reason is that
it's quick and easy to get things up and running and make a start,
but on the machines I'm using, which are all laptops of various ages,
it's not brilliantly fast. Still, while I'm experimenting, it will be
good enough. When I get to doing some more serious stuff and speed
becomes an issue, then I'll decide which way to go. As my goal is to
port the software I develop onto Raspberry Pi's eventually to fit
into the robot, then I suspect that the Pi's will be the bottleneck
as far as the imaging processing goes, but we'll cross that bridge
when we come to it.
But back to the
present! Having checked that I have all the libraries etc. installed
that are needed for SimpleCV, it was time to check it all worked. I
did some basic checks by grabbing an image from the laptop's built in
camera and displaying it on the screen. Next up was something a bit
more fun, so I loaded up the example code for face tracking and ran
that. The result is below. It's a little dark because of the light
coming in my office window, even with the blind closed, but I hope
you can see that my face is outlined by a green box drawn by the
software, which moves to keep around the image of my face as I move
around.
Basic Face Tracking using Python 2.7 & SimpleCV
Staggering though
this undoubtedly is, it quickly loses it's appeal. Even my grandson
gets bored with it after less than a minute! However, it shows what
can be done with just a few lines of Python code and the SimpleCV
library, which is impressive. So, it was on to the next step,
interfacing this with the head.
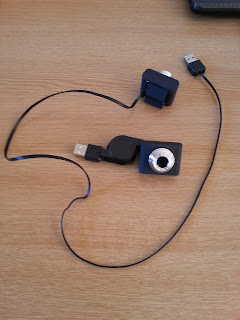
For this stage a
separate USB camera is required, small enough to be mounted in the
head. Fortunately these can be found easily enough on e-bay. The ones
I got are almost square, with a spring clip to allow them to be fixed
onto a support, and have a fine, very flexible USB lead of about half
a metre in length. They had a spring loaded cable retractor fitted,
which I removed from the one to be installed into the head (just
planning to fit one for now, a second will come later). The photo's
below show the cameras with and without the cable retractor, the
mounts in the head, and also how it looks with the mask in place.
Two of the cameras showing the spring mounting clip on the back of one, and the cable retractor on the other.
Behind the mask! - One of the cameras mounted in place, with the mount for the second visible.
In situ. A shot showing the head with the camera mounted. The Arduino controlling the servos can be seen in the background. The ultrasonic transducer isn't being used - it was from a previous test.
Closer view of the camera through the eye hole. The mounts were carefully measured and cut so that the camera sits just inside the mask. However, the style of the camera makes it look eerily like an eye!
Front view of the camera in place.
With the external
camera tested and fitted into the head, I modified my software in the
Arduino to provide an incremental movement towards the position of
the object received via the USB serial port, and also the software
for providing that position. I decided to go for a more general
purpose object tracking approach, rather than face tracking, as a) it
lends itself to more applications; and b) there's only so much
bobbing around you can do! The video below shows the initial result.
Basic object tracking - following a red disk.
That's it on the
head for now. I'm not finished with it yet, there are microphones, a
speaker and a second camera to fit yet, as well as making the cameras
move independently to give a stereoscopic vision and depth
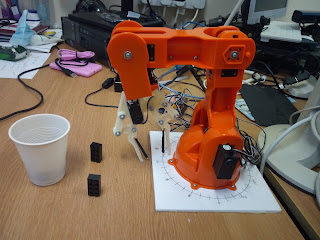
perspective – but those things will have to wait for now. The next
step is to look into arm manipulators.
So, until next time - Thats all folks!
Please
feel free to share.
Steve
Phoenix
Labs Ltd


Comments
Post a Comment