Post 9 - Where are we going?
Hello Folks.
First some GREAT NEWS! Our Robot Arm GUI Software has been approved as a project by Kickstarter, so we will be launching it very soon. Keep checking back for dates and more details. This software allows you to control a robot arm from your PC (Windows only at the moment) by creating a table of positions which can then be run as an automatic sequence. We are launching it at a price of only £5 to make it accessible to hobbyists and makers. As a launch special, the first 1000 people to back us on Kickstarter will get it for the amazingly low price of only£3. Multi user discounts will also be available for clubs and schools, again with an early bird discount for the first 1000 people who sign up.
Now, on with the blog!
In this post I thought I’d give some more insight into what we’re doing here at Phoenix Labs. For those of you who have been following us regularly, you may be aware that we are a small start-up company, set up by myself and my business partner, Shane, with the purpose of “creating Robots and AI solutions to everyday, real-world problems”, as I said in my first post. But what exactly does that mean? you may ask. The answer is that we are attempting to develop a robot which can provide a level of assisted living to people with age problems or disabilities, to enable them to remain in their own homes and retain their independence and dignity for as long as possible. As you can see from my previous post, I have direct experience of what’s involved in providing care, having been through it with my mother. Both myself and Shane have ‘day jobs’ which we do to pay our normal living expenses, and we are doing the development in our evenings and weekends. Progress is slow because of this, and we receive no funding or investment from anyone. We would like to spend more time working on this, hence releasing software we’ve developed to try to generate some revenue to allow us to do that, by working less at our ‘day jobs’. If you would like to support us in this, then please look out for our release on Kickstarter, or click on the links to ‘Buy Us A Coffee’ HERE or purchase some merchandise (T-shirts, mouse mats etc) HERE. To read more about us and what we’re doing, then please visit our website by clicking HERE. If our Kickstarter campaign is successful, then we will be releasing more low-cost, fun products, all of which will have educational value and will work together to take home built hobby robots to the next level.
From the previous posts you may have seen a pattern in what we are doing. We have developed a mobile robot base, using ultrasonics to detect and avoid obstacles. We have also developed software to allow a map to be created of the environment the robot is in. We have software to control a robot arm, and can create a sequence of moves which can be saved and re-played (using our GUI software), allowing complex functions to be built up. And we have a head, complete with a camera and some basic image processing capabilities – see Posts 3 & 4. I think you can see where this is going, in that we have the main building blocks we need for our robot – at least the physical ones. Although work is still going on to refine these and improve them, it’s also time to be looking ahead at what else is needed, and this blog describes some of these aspects.
One key area of exploration is in speech, both recognising what we are saying so that we can give verbal commands to the robot, and speech output, so that it can respond verbally. This area is currently being investigated, both in utilising online solutions, such as those from Google and Amazon, and stand-alone options, which are my preference. Of course, there needs to be some processing between the speech input and output, to determine what the robot is required to do, and we have some ideas on that, although it’s early days yet. There will be more on this area in a future post.
For now, though, I thought I’d share some work I’ve been doing on the vision sub-system, as this is the single biggest weapon in the arsenal of a robots senses, in my opinion, which allows it to perform its tasks. And so, to make progress on this front, I decided to do some more work in this area.
Although I haven’t done much in practice with image processing for a while, I have been studying up on the subject (study never ends in the field of AI & Robotics! Whoever said that “Science Never Sleeps” was absolutely right, studying and coding are what 2 in the morning is for! Lol).
And so on to image processing. There are some great guides out there to image processing with Python. I highly recommend the book ‘Practical Python and OpenCV’ by Dr Adrian Rosebrock, which is a very well written and easy to understand guide to the basics of image processing, with loads of useful examples which are explained step-by-step.
Useful though OpenCV is, it does have limitations. For example, object recognition is difficult to do beyond simple shapes. For that you need Neural Networks and Deep Learning, which is a little heavy going, but here again Dr Rosebrock has a guide, ‘Deep Learning for Computer Vision with Python’. Check out his website https://www.pyimagesearch.com/ to get details of these and his other tutorials.
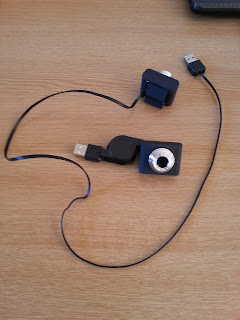
Anyway, I digress, as I don't want to go into that in this post. That's for a future one. What I want to look at for now is a special camera device I bought a couple of months ago. Although not primarily designed for use with PCs, it can be connected to one via a USB port. As well as a standard video camera, the unit also has a special infra red camera which provides distance to object information. The device I am referring to, in case you hadn’t guessed, is the Microsoft Kinect!

Figure 1 – The Microsoft Kinect
So, what's so special about the Kinect I hear you ask. The answer is that it’s that distance sensing ability. To understand it, you need to see an example of a distance image.
Here’s a screen capture from the Kinect’s cameras.

Figure 2 – Depth Image and Standard Camera Image
As you can see, the image on the right is from the standard camera, but the image on the left is from the depth camera. At first glance this looks like a monochrome image, however, closer inspection will reveal that the parts of the image closer to the camera are brighter than the parts which are further away. For example, the bottom of my tie is brighter than the area of my shoulders. This is because my tie is resting on my stomach, and so is closer to the camera than my shoulders (that gym subscription isn’t working, lol).
Here’s another example, looking across the end of our lab.

Figure 3 – Our Lab In Depth & Standard Images
In the centre of the normal photo on the right you can see a pale blue magnifier desk lamp. In the image on the left you can see that the front edge of the magnifier is brighter than the stand, which is towards the rear of the lamp. To the right of the lamp is a bench vice mounted on the front of the bench, while to the left is a can of Plastidip, also at the front of the bench. Both of these are bright in the depth image, indicating that they are closer than other objects which appear darker because they are further away. You get the idea!
Here’s another sample, this time just the depth image.

Figure 4 – Depth Only Image
In Figure 4 you can see that my hand is brighter than the rest of me because I’m holding it closer to the Kinect. My other arm, on the left of the image, also appears brighter than my body, because I’m reaching forward to press a key to capture the image, hence my arm is extending towards the Kinect.
The distance image is generated by the Kinect as an array of integers, one for each pixel in the image. It turns out that the depth integers are accurate to 1mm (or 1/25th inch), over a range from about 500mm to 8000mm, or 0.5 to 8 metres (that’s from 20 inches to 25 feet)! This is great because it gives us the ability to accurately find the distance to objects in front of the Kinect device.
And this brings us to the reason that I’m quite excited about the device. This is because if I can detect and recognise objects in the standard image on the right, and work out their x & y coordinates, then correlate the object within the depth image on the left, then I will have it’s (X, Y, Z) position in relation to the Kinect. With the Kinect mounted on a mobile robot, for example, then this can be used to move around while avoiding obstacles, like with the ultrasonic distance sensor in an earlier post, but with much more detail. Also, if we can recognise objects in the standard camera view, and know their position in the 3D world, then we can move towards or away from them, or even pick things up and move them around by having camera-hand coordination with the robot arm.
Now you’ve read the above, do you see why I am getting a bit excited about the possibilities offered by the Kinect. In a future post I’ll share how I’m getting on with using the Kinect for this. In the meantime, if you want to know more about computer vision, then as I said earlier, check out the PyImageSearch website at www.pyimagesearch.com which has loads of great tutorials and resources about computer vision using Python, the Raspberry Pi and the OpenCV computer vision library. It really is a must for anyone interested in Computer Vision.
For an in depth tutorial on the Kinect I recommend the book “Making Things See” by Greg Borenstein, published by O’Reilly. This can be obtained on Amazon in both hardcopy and Kindle format. The examples above were taken using code based on the sample code from this book.
So, until next time,
That’s all folks
Steve
Phoenix Labs Ltd


Comments
Post a Comment