Post 5 - Arms Race! - Part 1
Hi folks. Well, here
we are, the summer is definitely over and we seem to have skipped
Autumn and gone straight into Winter! Or am I just feeling the cold
more with each passing year? Lol. The holidays have been and gone,
although I have a couple of trips left to look forward to. I’ve
also had some paid work which helps to fund this Research &
Development that I’m doing, until I get to the point where I can
earn some money from what I’m doing!
So, now that I’m
back on the fun stuff, I’ve turned my attention to the next of the
major physical sub-systems on my list – Arms. Now arms are quite
complicated things mechanically, so rather than trying to build my
own from scratch, I had a look around to see what I could pick up.
There is quite an
array of robot arms out there on the market, as a quick search on
Google revealed, so the first task was to reduce the number of
candidates by applying some criteria. I listed my basic requirements
by jotting down what I wanted the arm to do. The main thing for me is
that I wanted one that could mimic the range of movements of a human
arm. If you’re not familiar with robot arms, this is referred to as
‘Degrees Of Freedom’ or ‘Degrees Of Movement’. Each joint
represents one degree of freedom, basically, so an elbow has one
degree of freedom. The exception to this is the shoulder, as this can
rotate and also go up and down, so this gives two degrees of freedom.
So my list had the following as requirements :-
Joints : Shoulder
– 2 DOF (Degrees Of Freedom);
Elbow – 1 DOF;
Wrist – 1 DOF;
Gripper –
1DOF;
Total DOF – 5
DOF.
That narrowed down
the choices considerably, as there are arms designed for pick &
place which have fewer DOF, and some that have more DOF for
specialised tasks. Also, there were a lot of heavy industrial arms,
which are too big and heavy for my development work.
Looking at my
revised search results, I found a few that seemed to fit my
requirements in that they had the right number of DOF, and were
relatively small and light weight. Some in this category also had a
rotating ‘wrist’, which provides an extra DOF, giving 6 in total.
After some consideration I decided that I could live without the
rotating wrist at this stage, as not having it would make the driver
software simpler. After the basic functionality has been achieved, a
version with a rotating wrist could be implemented later.
Some had basic two
pronged grippers, others had more sophisticated arrangements, ranging
to full ‘hands’ in some cases. However, for my purposes, just a
simple gripper would be fine.
So, what I was
looking for was a simple 5 DOF arm with a simple gripper and no
rotating wrist. Armed (ha ha!) with these requirements, I looked at
the search results again. I found that Maplin had a low cost arm
which met these requirements. What’s more, it is available in two
versions, manual control via a wired switch box, and a PC controlled
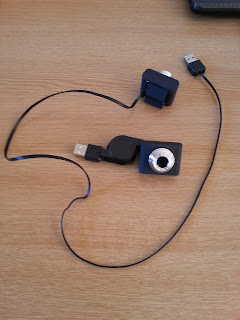
version, using a USB connection. Just the job!

Now, those of you
who have been following my posts will know that I like a bargain (I’m
not a cheapskate, I‘m thrifty, lol! I like to get value for money!)
so I had a quick look on my ‘friend’ ebay. Lo, and behold! There
were several available. Some were still as kits, others had been
assembled and were tested and working. The prices were very
attractive, too, ranging from £10 to £30. I secured a couple, going
for one with manual control, and one with the USB interface as that
may require less work to be able to do what I want it to do.
When they arrived I
found why they are sold cheaply on ebay. Once assembled, they are fun
to play with for a while, but then lose their appeal. The reasons
being that they aren’t powerful enough to lift more than 100 grams
(according to the instructions), they are slow in moving and there is
a lot of ‘play’ in the mechanics, meaning that it is difficult to
operate them with any precision. Also, there is no feedback provided,
even on the USB version, so there is no way for any controlling
software to know the actual position of the joints or the arm
overall.
Having said the
above, they would suit my purposes, which are to develop code to
control arms and to experiment with a range of movements which mimic
those of human arms. Once the code has been developed, it can be
applied to more sophisticated arms in future. That said, the lack of
feedback is an issue, and one that I needed to resolve first, which
is the subject of this post.
The main requirement
for the feedback is to know the angle of each of the joints. Knowing
these angles it’s possible to work out, through the magic of
trigonometry, the actual position of the gripper as a 3D coordinate
set, X, Y & Z. Don’t panic, I’m not going into the details
here, but for anyone who’s interested, this is called Kinematics.
So, how to measure
the angle of the joints? There are various devices aimed at doing
this. One set of these devices are called Encoders. Some of these
give out pulses as they rotate, which you can count and hence work
out a value for the rotation angle. Others give out a numerical value
directly, giving a reading in degrees or other angular measure. These
days most of them are programmable to give you lots of flexibility,
and they are usually high precision, aimed at factory automation
applications. Way too sophisticated for my purposes, not to mention
too big and heavy for the little arms I’m working with. And too
costly, to boot!
Onto the cheap and
cheerful solution, potentiometers! These are variable resistor
devices, used as volume controls in radios etc. They have a
resistance track, made of carbon, which has a terminal fixed at
either end. A third, moveable terminal, called the wiper, is free to
rotate along the length of the track, which is bent into a horseshoe
shape. As the wiper rotates, the resistance it measures with respect
to the end terminals changes, going from a minimum (wrt the left hand
terminal) when wound fully ant-clockwise, to a maximum when wound
fully clockwise. The angle these operate over is typically 270
degrees, so perfect for this application.
Potentiometers, or
pots for short, come in a range of sizes, but for this application, I
chose some miniature ones that had ‘thumb adjustment’ knobs.
These can be soldered directly into circuit boards, so are ideal, as
they can then be mounted onto the robot arm joints for sensing the
rotation. The photo below shows the pots I used, both with and
without the thumb adjustment knob fitted.

Miniature pots (l-r) underside; top view; with adjustment knob fitted in position
I
fitted these pots onto small pieces of strip board, and mounted them
onto the arms so that the centre of rotation of the pot was directly
over the centre of rotation of the joint. I then cut a groove in each
of the adjustment knobs most of the way down. This was to accommodate
the stiff wire actuators I used to turn the wiper as the joints
moved. I attached the other ends of the wire actuators into
convenient holes in the motor gearbox casings, and fixed them in
place with some blobs of hot glue. For the actuator wires I
straightened out some paper clips (ok, I am a cheapskate, lol) and
then bent them into the right shape to fit. I used two opposing wires
in order to reduce the amount of spring when the joints move.
I
measured and cut wires for the loom to connect the pots back to the
Arduino controller I was using for the reading of the pots and
calculating the joint angles, while the boards were loosely fitted
into position. I then removed the boards and soldered up the loom.
You can see in the photos that I ‘daisy chained’ the 5V and Gnd
wires between the boards to reduce the amount of wires in the bundle.
I picked up the 5V & Gnd from the Arduino board as there’s
enough power coming in from the USB port for this (I used 10k ohm
pots which only use 0.5mA per pot) as it keeps things simple. The
photo’s below shows the boards mounted.

Photo
showing the pots for (right to left) shoulder rotation, shoulder
elevation, elbow and wrist

Photo
showing the gripper jaws position sensor pot
I
wired the other end of the loom into headers using crimp terminals,
one for the power and the other for the 5 analogue voltages, as shown
in the photo below.

Showing
the loom wired into the power and signal headers.
These
headers were then plugged directly onto the Arduino Nano pins to test
out the feedback, see photo below.

Arm
feedback pots headers plugged onto Arduino pins.
I
then wrote a little test script for the Arduino to read the values
from each of the pots and display the results as both a voltage and a
position. After a little experimenting I discovered that the 5v on
the Arduino was, in fact, only 4.66v, so I used this figure in the
calculations to get a better accuracy. I will have to check if this
is the same on all Arduino Nanos or if it varies between them.
I
made a large scale protractor on a piece of card and used it check
the linearity of the feedback. What I found is that the pots are not
brilliantly linear, though they do give good repeatability. Also, I
found that the readings I got turning clockwise were different to
those when going anti-clockwise, but that the repeatability in both
directions was good. This is not a major problem as I can improve the
accuracy by having a linearisation table for each direction, with
intervals at 10 degrees, which is only 18 entries over the 180
degrees max movement I am looking for, with some of the joints being
less.
Below
is a shot of the completed arm under test.

Arm
with feedback under test.
That’s
it for this first part of the story on robot arms. Next time I’ll
describe the opposite case, using outputs from the Arduino to drive
the arm’s motors.
So
for now …..
That’s
all folks!


Comments
Post a Comment